ASP.NET Session and Forms Authentication

The title can be misleading, because in concept, one is not related to the other.  However, a lot of web applications mix them up, causing bugs that are hard to troubleshoot, and, at worst, causing security vulnerabilities.

A little bit of background on each one.  ASP.NET sessions are used to keep track and keep information related to a “user” session.  When a web server is initially accessed by a browser, the server generates a unique session ID, and sends that session ID to the browser as the value of a cookie (the name of the cookie is ASP.NET_SessionId).  Along with that session ID, a dictionary of objects on the server, often referred to as session state, is allocated corresponding to that session ID.  This dictionary can be used to keep track of information unique to that session.  For example, it could be used to keep track of items placed in a shopping cart metaphor.

Note that this “session” can exist even if the user has not authenticated.  And this is often useful.  In a retail web site (like Amazon), you can put items in your shopping cart, and only need to authenticate or sign on when you are ready to checkout — and even then, you can actually make a purchase without needing to authenticate, provided, of course, that a valid credit card is used.

Because this “session” is disjoint from authentication, it is better referred to as a “browser” session instead of as a “user” session.  In a kiosk environment, if a user walks away from the kiosk while there are items in a shopping cart, the next user to use the kiosk will still see the same shopping cart.  The web server doesn’t know any better that a different user is using the kiosk, because the same session ID is being sent back in the session cookie during interaction with the web server.

That dictionary of objects on the server, the session state, also poses certain complications that most developers are aware of.  In a web farm, some form of sticky load balancer has to be used so that session state can be kept in memory.  Or a centralized store for the session state is used to make the state consistent across the servers in the web farm.  In either case, service performance can be affected.  I have a very strong opinion against using session state.  I avoid it, if at all possible.

What about Forms Authentication?  Forms Authentication is the most common authentication mechanism for ASP.NET web sites.  When a user is authenticated, most commonly using a user ID and password, a Forms Authentication cookie is generated and is sent to the browser (the name of the cookie, by default, is .ASPXAUTH).  The cookie contains the encrypted form of an authentication ticket that contains, among other things, the user ID that uniquely identifies the user.  The same cookie is sent to the web server on each HTTP request, so the web server has an idea of the user identity to correlate to a particular HTTP request.

Everything I mentioned above is common knowledge for web developers.  Trouble and confusion only comes about when an expectation is made that an ASP.NET session can be associated with ASP.NET authentication.  To be clear, it can be done, but precautionary measures have to be taken.

The problem is related to session hijacking, but better known as session fixation.  Assuming that you’ve done your diligence of using SSL/TLS and HttpOnly cookies, there isn’t a big risk of having the session ID stolen/hijacked by sniffing the network.  And most applications also perform some session cleanup when the user logs out.  Some applications even ensure that a new session ID is created when the user logs in, thinking that this is enough to correlate a session state with a user identity.

Remember that the session cookie and the forms authentication cookie are two different cookies.  If the two are not synchronized, the web server could potentially allow or disallow some operations incorrectly.

Here’s a hypothetical (albeit unrealistic) scenario.  A banking application puts a savings account balance into session state once the user logs in.  Perhaps it is computationally expensive to obtain the account balance, so to improve performance, it is kept at session state.  The application ensures that a new session ID is created after the user logs in and clears the session state when the user logs out.  This prevents the occurrence of one user reusing the session state of another user.  Does it really prevent it?  No.

As an end-user having control of my browser, I am privy to the traffic/data that the browser receives.  With the appropriate tools like Fiddler2 or Firebug, I can see the session and forms authentication cookies.  I may not be able to tamper them (i.e., the forms authentication cookie is encrypted and hashed to prevent tampering), but I could still capture them and store them for a subsequent replay attack.

In the hypothetical banking application above, I initially log in and get SessionIDCookie1 and FormsAuthCookie1.  Let’s say the account balance stored in session state corresponding to SessionIDCookie1 is $100.  I don’t log out, but open up another window/tab and somehow prevent (through Fiddler2 maybe) the cookies from being sent through the second window.  I log in to that second window.  The web server, noting that the request from the second window has no cookies, starts off another session state, and also returns SessionIDCookie2 and FormsAuthCookie2.  Browsers usually overwrite cookies with the same names, so my SessionCookieID2 and FormsAuthCookie2 are my new session ID and forms authentication cookies.  But remember that I captured SessionIDCookie1 and FormsAuthCookie1 to use in a future attack.

In that second window, I transfer $80 away from my account, thereby updating the session state corresponding to SessionIDCookie2 to be $20.  I cannot make another $80 transfer in the second window because I do not have sufficient funds.

Note that SessionIDCookie1 has not been cleaned up and there is a session state on the server corresponding to SessionIDCookie1 which still thinks that the account balance is $100.  I now perform my replay attack, sending to the web server SessionIDCookie1 and FormsAuthCookie1.  For that given session state, I can make another $80 transfer away from my account.

You might say that the application could easily keep track of the forms authentication cookie issued for a particular user, so that when FormsAuthCookie2 is issued, FormsAuthCookie1 becomes invalid and will be rejected by the server.  But what if I use SessionIDCookie1 and FormsAuthCookie2 on the second window?  It’s the same result — I can make another $80 transfer away from my account.

Oh, you might say that the application should invalidate SessionIDCookie1 when SessionIDCookie2 is issued.  Sure, but how?  Unlike the forms authentication cookies, where the user identity is the same within both cookies, there is nothing common between SessionIDCookie1 and SessionIDCookie2.  And since there is nothing relating SessionIDCookies with FormsAuthCookies, there’s no mechanism to search for and invalidate SessionIDCookie1.

The only workaround for this is custom code that ties a SessionIDCookie with the FormsAuthCookie that was issued for the same logical session.  One of the following options should provide a solution.

  • Key your session states by an authenticated user ID instead of by a session ID.  No need for the session cookie.  This will not work for applications that need to keep track of session without authentication (e.g., online shopping).
  • Store the session ID as part of the payload for the forms authentication cookie.  Verify that the session ID in the session cookie is the same as that stored in the forms authentication cookie.  Keep track of the forms authentication issued for each user so that only a single forms authentication cookie (the most recently issued) is valid for the same user.

Maybe an overarching solution is to avoid storing user-specific information in the session state.  Remember that it is a “browser” session state, and has nothing to do with an authenticated user.  If you keep that in mind and only store “browser”-related information into session state, then you could avoid the problems altogether.

ASP.NET session fixation is not a very publicized problem, but is potentially a big risk, specially if improper assumptions are made with regard to session and authentication.  ASP.NET session fixation is also described long back in http://software-security.sans.org/blog/2009/06/14/session-attacks-and-aspnet-part-1/, and been reported through Microsoft Connect http://connect.microsoft.com/feedback/viewfeedback.aspx?FeedbackID=143361, but to my knowledge, has not been addressed within the ASP.NET framework itself.

Posted in ASP.NET | Tagged | 9 Comments

Yet Another Take on the Padding Oracle Exploit Against ASP.NET

Or an example Padding Oracle attack in 100 lines of C# code.

This post has been in my outbox for weeks, since I did not want to make it generally available before the patches were released.  Now that the patches are being pushed on Windows Update, and I also see that there are a couple of blog entries already providing the same details, I hope that making the source available would help developers understand how the exploit worked.

There’s been several web postings citing the vulnerability of ASP.NET, but few have tried to explain it.  Here’s my attempt to simplify it for you, dear reader, complete with C# code to perform the exploit on a padding oracle.  There are two kinds of attacks that I’ll be describing – the easier one is a decrypting attack, where the plaintext for encrypted data is obtained, and the more difficult one is an encrypting attack (where a forged encrypted request is sent).

None of the information I present here is secret, and all the steps can be obtained by thoroughly understanding the public documents describing how an exploit is performed.  None of the documents I’ve read specifically exploits ASP.NET, but coupled with knowledge on how ASP.NET works (Reflector helps a lot), an exploit program can easily be crafted.  The first and second documents are practically the same.  The third document describes the attack in more practical terms.

Contrary to what’s inferred in several blog posts, none of the papers successfully describe an encryption attack on ASP.NET.  Rizzo’s paper offers hints to how we can perform an encryption attack (not easy), but given enough time and HTTP requests by the attacker, it can be done.  I’ll describe the special case where the attacker can download any file from certain ASP.NET web sites using an encryption attack.  Update 10/13/2010: The PadBuster application in the third site above has been updated to use an encryption attack.

There are two padding oracles that I’m aware of in ASP.NET, there may be more.  The first oracle is the WebResource.axd handler.  It throws an HTTP 500 error if a padding error is encountered and either HTTP 200 or HTTP 404 if there isn’t a padding error.  The other one is ViewState decryption, but I did not investigate further on the second one, and most sites do not encrypt view state – that is, they just don’t place sensitive information in the view state and avoid the encryption/decryption.  Contrary to what’s been mentioned out in the net, the ScriptResource.axd handler is not a padding oracle.  The code for ScriptResource catches a padding error and returns an HTTP 404 in its place.  The ScriptResource handler, however, is what’s exploited in attempting to download any file from the web site.

The first fix has to be on the WebResource handler, to make it behave the same way as the ScriptResource handler (that is, catching the padding exception and returning an HTTP 404).  The processing code for ViewState may need to be fixed as well (like I mentioned, I didn’t explore the ViewState attack vector).  I will also make the assumption that the encrypting method is known (and the attacker knows what the cipher block size is).  This is typically 3DES or AES, but it’s just an additional step to check if the attack works for one or the other.

Finding The WebResource Padding Oracle.

First is to find an existing ciphertext for a request to the WebResource handler.  Inspection of the generated HTML page from an ASP.NET application can easily find this.  Even the simplest ASP.NET application will include a WebResource request to the embedded “WebForms.js” resource.  The decrypted form of that request parameter is “s|WebForms.js”.  It doesn’t have to be that specific request – any WebResource request will do, because we know that it’s a valid request to the ASP.NET application.

Performing The Decryption Attack.

With a known valid ciphertext, we use that ciphertext as the prefix blocks for a padding oracle exploit.  I won’t go into detail into the mathematical aspects of this (it’s all described in the papers).  Suffice to say that we perform a padding oracle decryption attack by sending several “known ciphertext” + “garbled block” + “ciphertext block” to the server.  Decrypting a single ciphertext block will take at most n*256 requests, where n is the number of bytes in a block.  For 3DES-based encryption, that’s a small 2000 requests per block.

Performing The Encryption Attack.

The papers and the “padBuster” utility available for download around the net assumes that the initialization vector (IV) is controllable by the attacker.  It may be true on some systems, but not on the other flaw with ASP.NET (described next).

There is this big vulnerability in one of the HTTP handlers that came out with ASP.NET 3.5.  Specifically, the ScriptResource.axd handler allows download of any file within your application directory.  But only if an attacker can figure out what the encryption key to use in encrypting the download request.  Assuming an attacker can find what the encryption key is, what would the plaintext look like?  A plaintext request for a file in the application directory looks like one of these:

r|~/Web.config

R|~/Web.config

Q|~/Web.config

q|~/Web.config

The different prefixes indicate different variations of the request (whether the downloaded stream should be gzip’ed and such).  The path could also be an absolute path instead of an application-relative path.

If the attacker does not have the encryption key, and the IV is the prefix of a request to ScriptResource, then it’s easy for an attacker to craft such a request by first performing a decrypting padding oracle attack for the last block of the request against an existing ciphertext block.  Given the intermediary bytes for the last block, the ciphertext block for the second-to-the-last block is derived, and another decrypting attack is made on it.  The chain is followed until the first block, where the IV is derived and the IV sent as a prefix.  This would only involve about 4000 requests to the padding oracle since the length of the desired attack request is only two 3DES blocks (or one AES block).

That’s only if the IV were sent as the prefix to the encrypted block.  It isn’t.  Not for the ScriptResource handler.

However, there’s this other flaw.  If the victim web site makes a certain usage of the ScriptResource handler, the source of the HTML page would have a request (encrypted) that is similar to one of the attack request.  This is with the use of CompositeScripts in the ScriptManager.  With the use of CompositeScripts containing a script reference to a JavaScript file, the encrypted request starts with “Q|…”.  If the attacker can find out that CompositeScripts are used in a page (by using the padding oracle to decrypt the first block of a ScriptResource request and checking if it starts with “Q|”), then that request can be used as a prefix to an attack request.

Specifically, the attack request will be composed of: “prefix” + “garbled block” + “||~/Web.config”.

Because of how the ScriptResource handler processes the request, the garbled block could be ignored and the subsequent part of the request for the file download is honored.  This causes the attack to append the contents of the requested file into the rest of the results.

If the attacker can not find an existing ScriptResource usage that has the “Q|” prefix, then it comes down to being able to craft a ciphertext block that would correspond to having a 2-character prefix of “r#”, “R#”, “Q#”, or “q#”.  This is not trivial, but still boils down to only being able to forge a single block.  Because of the nature of block cryptography, a block with the correct prefix could be forged in at most 256*256/4 (~16000) attempts.  Once that single block is forged, then it can be used as the prefix to the attack request where there is still a garbled block in the middle and a file download at the tail end of the attack.  The attack request will be composed of: “prefix” + “garbled block” + “|||~/Web.config”.

16000 HTTP requests.  8000 requests on average.  It’s not a big number and can be done in a matter of minutes.

The provided code has more inline comments on it.  The constants in the code should be substituted with what’s obtained from visual inspection of the generated HTML file for a page.

//peterwong.net/files/PaddingOracleExploit.zip

Posted in ASP.NET | Tagged , | 1 Comment

Creating an OPENSTEP Boot CD

How OPENSTEP 4.2 boots in m68k hardware.

A NEXTSTEP/OPENSTEP CD cannot be made to boot in both sparc and m68k hardware.  With NEXTSTEP 3.3, there was one installation CD for m68k/i386 and another installation CD for sparc/hppa.  For sparc, the hardware expects the bootloader to start at offset 0x00000200 (512) of the CD.  For m68k, the hardware expects a disklabel at the very start of the CD, and the disklabel contains a pointer to the bootloader somewhere else in the CD.  A disklabel is 7240 bytes in size and cannot fit into the available first 512 bytes of a sparc-bootable CD.

With OPENSTEP 4.2, there was a single "User" installation CD for m68k/i386/sparc (I think they dropped support for the hppa platform at that time).  Given those three platforms, NeXT probably opted to make the CD bootable on sparc hardware.  The sparc magic number 01 03 01 07 is present at offset 0x00000200 of the CD.  Note that to boot from a CD, sparc workstations need SCSI CDROM drives that provide 512-byte sectors, instead of the more common 2048-byte sectors.  Older drives from Plextor, Yamaha, and Pioneer typically have a jumper that sets the sector size.  Trying to boot the CD from m68k hardware gives the following error:

  Bad version 0x80000000
  Bad cksum
  Bad version 0x0
  Bad cksum
  Bad label

An m68k/i386 installation diskette and an i386 driver diskette were provided in 3.5" 1.44MB format.  The installation diskette is used to bootstrap the installation into m68k hardware.  I could not find an m68k bootloader anywhere in the installation diskette, which leads me to think that the boot process probably traps into the m68k ROM, which then loads a copy of the disklabel from either offset 0x00002000 or offset 0x00003C00 of the CD.  From the disklabel, the m68k bootloader can be located in the CD and the boot process continues, loading the m68k kernel "sdmach".

How OPENSTEP 4.2 boots in i386 hardware.

An i386 ROM loads the i386 initial "B1" bootloader from the first 512 bytes of the diskette.  The initial bootloader loads the standard i386 bootloader from offset 0x00008000 of the diskette.  In the boot process, the i386 kernel "mach_kernel" is loaded, "sarld" is loaded, the user is prompted to insert the driver diskette, drivers are loaded (the driver for the IDE or SCSI CD drive needs to be loaded so the CD can be read), and installation copies files from the CD into the hard disk.

Creating an m68k-bootable "User" OPENSTEP CD.

Since m68k hardware looks for a disklabel at the start of the CD, we need only to copy the duplicate disklabel located at offset 0x00002000 or offset 0x00003C00 of the CD.  From a raw "ISO" image of the OPENSTEP 4.2 CD, the disklabel can be extracted with:

  dd bs=1 count=7680 if=OPENSTEP42CD.iso of=OPENSTEP42CD.lbl skip=8192

Overlay the extracted disklabel into the first part of the CD image:

  dd bs=1 count=7680 if=OPENSTEP42CD.lbl of=OPENSTEP42CD.iso

Several bytes in the disklabel need to be changed.  The structure of the disklabel is available at bootblock.h.  The first set that needs to be changed is the block number in the disklabel.  If the disklabel originally came from offset 0x00002000, then its block number is 4 (where a block is 2048 bytes).  The new disklabel at the start of the disk should be at block number 0.

The second set of bytes that need to be changed is the pointer to the boot blocks (bootloader).  There are two pointers in the disklabel.  The first points to an hppa bootloader (block 0x10), and the second points to an m68k bootloader (block 0x30).  The hppa bootloader surprised me because I thought hppa platform support has been dropped in OPENSTEP.  Also note that the sparc bootloader that started at offset 0x00000200 has been partially overlaid by the new disklabel, so the new CD image will not be sparc-bootable.  We change the boot block pointers in the disklabel to point only to the m68k boot blocks — first pointer is set to 0x30, second pointer is set to 0xFFFFFFFF.

The third set of bytes that need to be changed is the default kernel loaded by the bootloader.  From the original disklabel, the kernel name is "mach_kernel".  Although "mach_kernel" is present on the CD, it is a tri-fat binary.  The m68k bootloader cannot load the tri-fat binary, and instead needs to load the Mach-O binary "sdmach".  Although you can manually specify the kernel name on the ROM boot prompt, the disklabel is altered to use "sdmach" instead of "mach_kernel" as the default.

The last set of bytes that need to be changed is a checksum on the disklabel.  NS_CKSUM.C is a very short program that illustrates the checksum calculation.  It reads the bytes in the disklabel preceding the checksum itself, and outputs a 16-bit hexadecimal value to use as the new checksum.  With the updated OPENSTEP 4.2 CD disklabel, the checksum calculated is 0xCE22.

Creating an i386-bootable "User" OPENSTEP CD.

The i386 bootloader is located on the install diskette boot blocks.  This is a copy of the /usr/standalone/i386/boot binary located on the CD.  Additionally, the first 512 bytes of the diskette contains a copy of the /usr/standalone/i386/boot1f binary.  Unlike m68k hardware, i386 hardware does not bootstrap from the first few blocks of the CD.  Instead, i386 hardware makes use of the El Torito specification for bootstrapping from a CD.  The El Torito specification was developed by Phoenix and IBM.  With an El Torito CD, a bootstrap image is loaded by the BIOS.  The bootstrap image can be treated as a diskette in drive "A:".

One limitation in El Torito is that you can only bootstrap a single image.  Although it allows you to select from multiple bootstrap images on the CD, you only bootstrap one of the images ("B:" cannot be mapped to another image in the CD).  You also cannot "swap" images during the El Torito boot process, as required by the OPENSTEP i386 installation process where it asks that you eject the install diskette and insert the driver diskette.

With "mach_kernel" and "sarld", no additional drivers can fit in a 1.44MB install diskette.  The good thing in El Torito is that the bootstrap image can be the image of a 2.88MB diskette.  If we can combine the OPENSTEP install diskette and driver diskette into a single 2.88MB diskette, it can be used to boot from the CD.

There are several ways to create the 2.88MB diskette.  One way is to use an actual 2.88MB SCSI diskette drive and initialize a 2.88MB diskette appropriately, then copy the contents of both OPENSTEP diskettes into the new diskette.  Since I was currently working on a Windows box, I opted to use a virtual machine running OPENSTEP to set up the diskette image.

First, create a 2.88MB file (2,949,120 bytes).  You can use any available utility to create a file of that exact size.  The contents do not matter, since it will be re-initialized from within OPENSTEP.  I tried to mount the 2.88MB file as a virtual floppy drive in VirtualBox.  However, when treated as a floppy drive, the OPENSTEP i386 floppy driver refuses to initialize it as 2.88MB, citing that 1.44MB is the limit.  VirtualBox does not provide a BIOS configuration screen where you can change "A:" into a 2.88MB drive.  Virtual PC 2007 has the BIOS configuration screen, but as reported by others, OPENSTEP installation causes a processor exception in Virtual PC 2007.

The 2.88MB file is mounted as a virtual IDE disk in VirtualBox.  The VMware-format F288.vmdk file is used to describe the virtual disk F288.img as having 160 cylinders, 2 heads, and 18 sectors/track.  IDE sectors are 512 bytes in length, giving a total of 160*2*18*512 = 2.88MB.

Once assigned in VirtualBox running OPENSTEP, the 2.88MB disk is initialized as:

  /usr/etc/disk -i -b -B1 /usr/standalone/i386/boot1f /dev/rhd1a 

The new disk is mounted:

  mkdir /F288 
  mount /dev/hd1a /F288 

And files copied from the install diskette and driver diskettes:

  cp -r /4.2mach_Install/* /F288 
  cp -r /4.2mach_Drivers/* /F288 

Not all the drivers will fit, so some of them should not be copied.  I opted to not copy most of the SCSI drivers, since I will be installing from an IDE/ATAPI CD drive.  The /F288/private/Drivers/i386/System.config/Instance0.table is edited so "Prompt For Driver Disk" is "No".  We now have a 2.88MB "F288.img" file that can be used as the El Torito bootstrap image.

How do we combine the OPENSTEP 4.2 CD, and the 2.88MB bootstrap image into a single El Torito ISO9660 CD?  The OPENSTEP 4.2 CD is not in ISO9660 format.  It is in a variant of the 4.3BSD UFS format.  What’s great in this format is that the UFS filesystem is in a "relative" location in the CD.  In bootblock.h, the disklabel specifies the size (in blocks) of the "front porch" that precedes the actual UFS filesystem.  The "front porch" contains disk housekeeping information and precedes the UFS filesystem.  The raw UFS filesystem can be extracted from the CD image with:

  dd bs=2048 if=OPENSTEP42CD.iso of=OPENSTEP42CD.ufs skip=80

Having "F288.img" and "OPENSTEP42CD.ufs", we fire up our disk-burning application to create an El Toriro CD image.  The ISO9660 filesystem contains only the single OPENSTEP42CD.ufs file.  With the CD image created, we can find that the UFS filesystem got stored starting at offset 0x00360000.

We need to put the same block 0 disklabel into the CD image, but several bytes need to be changed.  The first set of bytes that need to be changed is the size of the "front porch".  Since the UFS filesystem has been moved to offset 0x00360000, the "front porch" value should be 0x06C0 (1728 blocks).  The other set of bytes that need to be changed is the checksum on the disklabel.  With this updated disklabel, the checksum calculated is 0xD492.

The disklabel is again overlayed into the start of the CD image:

  dd bs=1 count=7680 if=OPENSTEP42CD.Block00.ElTorito.lbl of=Disc.iso

Creating an m68k-bootable and i386-bootable OPENSTEP CD.

Extending the concepts further, we can create a CD that is bootable in both m68k and i386 hardware.  The ISO9660 volume descriptors start at offset 0x00008000 (block 16).  32KB is not enough to fit a disk label and an m68k bootloader.  The /usr/standalone/boot.cdrom file is 49812 bytes in size.

For this El Torito CD image, the ISO9660 file system contains the two files boot.cdrom and OPENSTEP42CD.ufs, along with the 2.88MB bootstrap image.  A few changes are in order for the disklabel.  The UFS file system now starts at offset 0x0036C800 of the CD, so the "front porch" value should be 0x06D9 (1753 blocks).  The boot.cdrom image starts at offset 0x0036C000 of the CD.  The first boot block pointer should be 0x06C0, and the second boot block pointer is left as 0xFFFFFFFF.  The new checksum of the disklabel is 0xDB3B.

The disklabel is again overlayed into the start of the CD image:

  dd bs=1 count=7680 if=OPENSTEP42CD.Block00.ElTorito.m68k.lbl of=Disc.iso

With those changes to Disc.iso, the image can be burned to a CD which is bootable in both m68k platforms (as long as you have the latest ROM that allows booting from the CD) and i386 platforms.

Miscellaneous files for download.
Posted in Retrocomputing | 11 Comments

Debian on a Seagate DockStar

I bought a Seagate DockStar a couple of months ago.  What attracted me to this device was its size, its low price (compared to other Plug Computers), and support for a standard Linux Debian distribution.  I would have wanted something that I could install Ubuntu on, but Ubuntu does not provide support for the ARM v5 architecture.  I’m okay with Debian though, and Debian provides packages to this “armel” device even in their “squeeze” testing release.

SeagateFreeAgentDockStar-2

The DockStar has 128MB of RAM and 256MB of flash memory.  It has 4 USB ports, and unlike other Plug Computers, the ports are powered so you can attach regular USB thumb drives as well as higher-capacity portable drives.  The factory setting has the NAND flash memory set into four partitions.  The first partition mtd0 (1 MB) contains a very old U-Boot bootloader.  The second partition mtd1 (4 MB) contains a Linux kernel image, and the third partition mtd2 (32 MB) contains a Linux jffs2 file system.  The remaining partition mtd3 (219 MB) is unused.

Hacking the DockStar to boot a different Linux system from a USB drive all stemmed from the instructions initially posted at http://ahsoftware.de/dockstar/.  In essence, the bootloader environment variables are changed to cause the mtd0 bootloader to chain to another bootloader that gets installed at mtd3.  The installed mtd3 bootloader can then check for USB drives and boot the Linux kernel from there.

To accommodate a fallback to the original Pogoplug environment in case the USB drive fails to boot, a “switching” approach was made to the bootloader environment variables – that is, at each boot, the variables would be changed between booting the mtd1 kernel and booting a USB drive kernel.  However, the bootloader environment variables are themselves stored somewhere in mtd0, so this switching approach may potentially be a cause of your device getting bricked (if something fails in the update to mtd0).  Because of technical limitations, the installed mtd3 chained bootloader cannot be made to boot back into the mtd1 kernel if it fails to boot the USB drive.  Some users have opted to configure the boot sequence such that it always tries the USB drive, but does not change the bootloader variables in mtd0.  If the USB boot fails, the USB drive can just be mounted on another machine and get fixed.

Although it’s been desired by all that mtd0 should not be updated on every boot, there were discussions on whether the old U-Boot bootloader at mtd0 should just be updated.  It’s true that writing to the mtd0 U-Boot has its risks, but mtd0 is being re-written anyway (on every boot) if the switching mechanism is used.  So a one-time update to mtd0 sounds more reasonable.  This also frees up mtd3 for installing other things, like maybe a very small 219 MB Linux installation.

Step 1.  Prevent the DockStar from “phoning home”.

Out of the box, if you connect the DockStar to your network, it will retrieve firmware updates and disable ssh on the device.  To prevent this, I disconnected my home router from the Internet, but had it still responding to DHCP requests.  There is often a page from the mini web server in your router that lists out the IP addresses it has handed out, so that you can determine what IP address the DockStar received via DHCP.  Knowing that, you could ssh into the DockStar with the default password, comment out the script command that runs the Pogoplug software (which retrieves the firmware update from the Internet) and save that back into flash memory.  This is documented in http://ahsoftware.de/dockstar/.  It’s been mentioned that it’s better to just add a command to kill the offending process, so that other kernel modules can get loaded.  But I do not trust any executable from the cloudengines directory to not “phone home”, so I’m fine with disabling the whole script.

Step 2.  Update the mtd0 U-Boot and environment variables.

Jeff Doozan has been active on getting this done easily, and great instructions are posted at http://jeff.doozan.com/debian/uboot/ and subsequently adopted at http://www.plugapps.com/index.php5?title=PlugApps:Pogoplug_Setboot

Step 3.  Install the Debian “squeeze” release into a USB drive.

I opted to cross-install Debian’s armel distribution using debootstrap.  Since I was working from an Ubuntu desktop machine, my USB drive was at /dev/sdb.  I made three partitions (one 1GB ext3 partition, one 1GB swap partition, and another ext3 partition) and used the following to create the file systems:

    sudo mkfs -t ext3 /dev/sdb1
    sudo mkswap /dev/sdb2
    sudo mkfs -t ext3 /dev/sdb3

I obtained and used the cross-platform bootstrapper.  I opted to include the ntp package (because the DockStar does not have a battery-backed RTC), the USB automounter, the ssh server, the U-Boot image utilities, and the Linux kernel at this time.  Other packages can be installed later once we get the DockStar to boot from the USB drive.

    sudo apt-get install debootstrap
    sudo mount /dev/sdb1 /mnt
    sudo /usr/sbin/debootstrap --foreign --arch=armel \
        --include=ntp,usbmount,openssh-server,uboot-mkimage,linux-image-2.6.32-5-kirkwood \
        squeeze /mnt http://ftp.us.debian.org/debian
    sudo umount /mnt

Unmount the USB drive from the desktop and attach it to the DockStar.  The DockStar will still boot to the Pogoplug environment since there isn’t a valid U-Boot kernel image at the USB drive at this time.  After ssh’ing into the DockStar:

    mount /dev/sda1 /mnt
    /usr/sbin/chroot /mnt /bin/bash
    PATH=/usr/sbin:/sbin:$PATH
    mount -t proc none /proc
    /debootstrap/debootstrap --second-stage

Although some prebuilt kernels are available at http://sheeva.with-linux.com/sheeva/, I opted to use the standard kernel from Debian:

    mkimage -A arm -O linux -T kernel -C none -a 0x8000 -e 0x8000 \
        -n "vmlinuz-2.6.32-5-kirkwood" -d /vmlinuz /boot/uImage
    mkimage -A arm -O linux -T ramdisk -C gzip -a 0 -e 0 \
        -n "initrd.img-2.6.32-5-kirkwood" -d /initrd.img /boot/uInitrd

I then performed some housekeeping stuff before the reboot of the DockStar:

    echo "dockstar" > /etc/hostname
    echo "LANG=C" > /etc/default/locale
    echo "/dev/sda1 / ext3 defaults 0 1" >> /etc/fstab
    echo "/dev/sda2 none swap sw 0 0" >> /etc/fstab
    echo "none /proc proc defaults 0 0" >> /etc/fstab
    echo "auto lo" >> /etc/network/interfaces
    echo "iface lo inet loopback" >> /etc/network/interfaces
    echo "auto eth0" >> /etc/network/interfaces
    echo "iface eth0 inet dhcp" >> /etc/network/interfaces
    echo "deb http://ftp.us.debian.org/debian squeeze main" >> /etc/apt/sources.list
    echo "deb-src http://ftp.us.debian.org/debian squeeze main" >> /etc/apt/sources.list
    echo "America/Los_Angeles" > /etc/timezone
    cp /usr/share/zoneinfo/America/Los_Angeles /etc/localtime
    passwd root
I exit back to the Pogoplug-based environment and unmount the USB drive.
    exit
    umount /mnt
Step 4.  Boot into the Debian system.

Once the Debian system is setup in the USB drive, you can issue a standard /sbin/reboot.  The updated bootloader would see a kernel image in the USB drive and boot the Debian system we have just installed.  From another machine, you can ssh into the DockStar and install additional packages, for example:

    apt-get install apache2
    apt-get install dpkg-dev
    apt-get install netatalk    

And there you have it.  A full Debian “squeeze” installation in an “armel” device.  With Apache, it becomes a full-pledged headless web server.  With the USB ports, it’s very convenient to transfer files into the system using USB thumb drives and make them available throughout your network.


Update 10/30/2010: Corrected pre-formatted text and added additional housekeeping commands.

Posted in Computers | Tagged , | 15 Comments

The Shrinking Digital Camera Packaging

Have you noticed how consumer packaging for certain electronics have shrunk over the years?  I’m amazed with how that’s happened with digital cameras.  My oldest digital camera was an Apple QuickTake 100 which was one of the earliest consumer digital cameras (providing storage for 8 whopping 640×480 digital pictures or 32 of the smaller 320×240 pictures).  Its box was about the size of how netbooks are packaged now — about a couple of reams of paper stacked upon each other.

Apple QuickTake 100-1

Going through several digital cameras over the years, packaging was significantly smaller.  I’ve had a Minolta, a Kodak, and a Nikon digital camera, all packaged about the same size.  Judith needed a new point-and-shoot camera to quickly catch pictures of the family during events, without having to lug around our digital SLR.  We ended up getting a Panasonic HF-20 and the size of its packaging was a mere several CD jewel cases.  Just enough to stick the camera in, with some accessories, cables, a CD, and a thin “getting-started” booklet.  Just amazing!

IMG_8071

Posted in Around the House | Tagged | Leave a comment

Kubuntu Lucid Lynx in VirtualBox on Windows 7

I’ve been using VirtualBox as my virtualization platform of choice on Windows 7.  Several years back, I liked Virtual PC 2007, but ever since I wanted to try NEXTSTEP/OPENSTEP on a virtual platform, I switched over to VirtualBox (Virtual PC 2007 was causing a kernel panic during OPENSTEP installation).  I do use Windows Virtual PC in certain circumstances, and have been playing around with XP Mode, but VirtualBox has been stable and updates are frequent (even after Oracle’s acquisition of Sun).

A week ago, I was upgrading a bunch of Linux installations and one of them was my VirtualBox Kubuntu install.  I opted for a clean installation of Kubuntu Lucid Lynx (tried 10.04 and then tried 10.04.1).  Installation ran smoothly on all my attempts, but when it came to the initial boot of the installed system, it would always first show an error message about the BIOS and then hang on the splash screen:

image

image

It took so many attempts to figure out a workaround.  I suspected so many things, from GRUB2 to the kernel to Xorg.  An old colleague Scott Hanselman blogged about having to install Ubuntu on Windows Virtual PC and having to modify GRUB2 to pass certain parameters to the kernel at boot time.  The additional parameters were not necessary with VirtualBox because in my attempts, I even tried installing Ubuntu Lucid Lynx (also 10.04.1) without any changes and that didn’t hang on the splash screen.  Installing Ubuntu did show the same BIOS error message “piix4_smbus 0000.00.07.0: SMBus base address uninitialized – upgrade bios or use force_addr=0xaddr” so that may not be the cause of the issue I’m encountering.

Back to Kubuntu, knowing that GRUB2 is still installed as the bootloader, you can hold down the SHIFT key, and view the command line used to boot the kernel:

image

image

I played around with the command line and found that removing the “splash” parameter was the workaround to the issue.  Once you’re able to boot into the system, you can make the change permanent by editing the GRUB defaults at /etc/default/grub and performing an update-grub.

image

Searching for the root cause of the issue, I learned that starting with Lucid, a transition was made from Usplash  to Plymouth (adopted from Fedora) for the boot experience: easier theming of the splash screen, flicker-free transition from the splash screen to X.  All summarized in http://wiki.ubuntu.com/FoundationsTeam/LucidBootExperience

I suppose the Plymouth packages could be uninstalled, but I’m left wondering why booting Ubuntu does not have this issue.  Also, this is a virtual machine, so whatever graphics hardware I have is irrelevant (I think VirtualBox emulates a plain VESA/VGA display).  I could switch over to Ubuntu, but I’ve grown familiar with KDE over the years.  I preferred KDE over GNOME ages ago, though there seems to be more active development happening in GNOME and it has dramatically improved.  I do keep a Debian stable release (lenny 5.0.5) installation around, and perhaps I could re-familiarize myself with GNOME using that.

Posted in Computers | Tagged , , | Leave a comment

Apple IIgs GS/OS Boot Disks

A few weeks ago, I had to access a ProDOS-formatted hard disk within GS/OS.  Since the CFFA where I regularly boot from was temporarily unavailable, I had to boot from the 3.5” drive.  I have several System 6.0.1 boot disks (sometimes distributed with other applications), but what I’ve noticed is that Finder was absent from them.  Once booted, you can insert another 3.5” disk containing Finder and launch it.

The restriction is disk capacity.  If you create a 3.5” bootable disk from the System 6.0.1 Installer, there is not enough space left to add Finder.  I really wanted to launch Finder automatically without swapping disks, so I decided to look into what files I can remove to make space for Finder.  This led to making a compilation of boot disks that I could use, depending on what I was going to use my system for.

MassStorage.po is what I commonly use.  It has only the ProDOS and HFS FSTs.  Also removed are some of the fonts, sound tools, and printer drivers.  In their place I’ve added the SCSI disk and CD drivers as well as the CompactFlash driver, which were useful in accessing mass storage devices.

The other boot disks I made were for connecting to the network.  The AppleShare client drivers take up a lot of space, so I had to create separate disks for ROM1 and ROM3 machines.  Marinetti is also huge, so I also have separate disks for ROM1 and ROM3 machines.

//peterwong.net/files/AppleIIgsBootDisks/MassStorage.zip

//peterwong.net/files/AppleIIgsBootDisks/AppleShare-ROM1.zip

//peterwong.net/files/AppleIIgsBootDisks/AppleShare-ROM3.zip

//peterwong.net/files/AppleIIgsBootDisks/MarinettiMacIP-ROM1.zip

//peterwong.net/files/AppleIIgsBootDisks/MarinettiMacIP-ROM3.zip

//peterwong.net/files/AppleIIgsBootDisks/MarinettiUthernet.zip

Posted in Retrocomputing | Tagged | 2 Comments

Demystifying the Bandai Pippin Developer Dongle

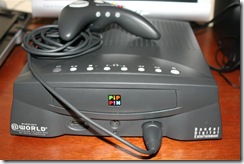
I’ve had my Bandai Pippin @World for years.  The Pippins were game consoles manufactured by Bandai based on the PowerPC Macintosh.  It runs a special version of Mac OS 7.x.  Pippin CDs can actually be played on PowerPC-based Macs (I’ve played Mr. Potato Head on my iBook G3).  The Pippins were initially released in the Japanese market labeled as AtMark, and subsequently released in the U.S. labeled as @World.

Bandai Pippin AtWorld-9

Pippin CDs contain a regular HFS file system.  The CDs contain a hidden file under the root folder, named “PippinAuthenticationFile”.  If this file is invalid or not present, then the Pippin does not boot.  This mechanism serves as Apple’s approach to prevent homebrew development of applications for the console.  Of course, it does not prevent piracy, because a copied CD would still have the same authentication file.

There is an interesting write-up of the authentication mechanism at Hacking the Pippin.  From my reading of the SDK documentation, a developer would write the application, and once ready for production, the application is sent to Apple.  Apple would create the corresponding authentication file and send it back to the developer, which then gets included into the CD master for mass production.  Each authentication file is different – perhaps some hash calculated from other contents of the CD (if anyone knows how, please contact me).

Aside from testing on PowerPC Macintosh systems, how would the developers have tested their applications on the console itself?  It seems that the newer 1.3 ROMs do not perform the same authentication process, but I think these ROMs were only present in the units supposedly available in Europe, prototyped for release by Katz Media.  The common AtMark and @World units I’ve seen all have the 1.0 or 1.2 ROM.

The special dongle, which previously has been suspected to be needed to generate the authentication file, seems to actually be another mechanism to disable the authentication process.  Developers were provided these dongles so that they could test the application on the Pippin even before they send the application to Apple to create the authentication file.

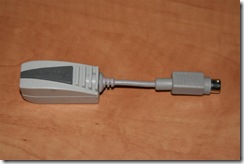
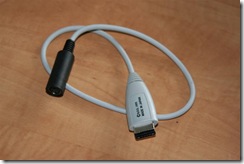
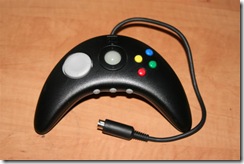
BandaiPippinDongle BandaiPippinADBConverter BandaiPippinADBController

The dongle has a standard ADB connector, so an ADB adapter is needed to convert from the Pippin’s flat “ADB” port to the standard ADB port.  I have what I think is a developer controller that has a standard ADB connector.  This controller chains to the dongle and behaves like a regular Pippin controller.

I took a regular Pippin CD, made an ISO image of it, and edited the HFS file system in the image to remove the authentication file.  I burned the updated image back to a CD, and tried to boot the Pippin from that.  Sure enough, without the dongle, the Pippin rejects the CD.  But with the dongle attached, the Pippin merrily loads and runs the application from the CD.

The Pippin platform has been out of support from Apple for so many years now.  I just wish that the algorithm that produces the authentication file could be publicly documented, so that retro-computing enthusiasts can continue making homebrew applications for the platform.

Posted in Retrocomputing | Tagged , | 3 Comments

Kodak W820 Digital Picture Frame

It’s April already, and I’ve so been itching to write about one of the toys we’ve bought over the holiday season (yes, three months ago).  The Kodak W820 is an 8-inch digital picture frame.  I wasn’t a fan of digital picture frames before, but when I saw the item go on sale for more than 50% off in an online store, I thought I’d give it a try.  Sure glad I did.  The next two months after we bought it, it had always been out-of-stock from most stores.

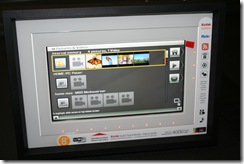
The resolution is lower compared to high-end digital picture frames, but still enough for the casual living room picture frame.  It has the standard memory card slots and USB connector so you could pretty much attach any storage device to view the contained media.  User interface navigation is performed via some sensors around two of the frame borders.  Not a real touch-screen interface, but useable enough for me.

It plays audio and video!  Audio files can be played by themselves or set as background music for slideshows of your pictures.  It plays all the video file formats that I use from my personal video collection.  It sort of performs as an additional 8” DVD player (loading the video from a memory card rather than a DVD disc), so my older portable DVD player is now seeing less use.

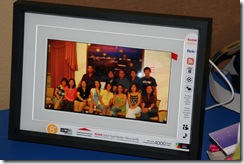
What really sets it off from other digital picture frames is its WiFi capabilities.  Out-of-the-box, you set up the WiFi SSID like any other device, and you can instantly connect to certain provided services.  You could connect to a weather service, a news service, a sports services, and even subscribe to Flickr albums.  The services are provided as “channels” through FrameChannel.  Once you register a free account in FrameChannel, you could subscribe to additional channels, which can vary from great photography channels to cooking recipe channels.

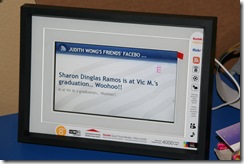
Aside from the weather channel, the most useful channels we’ve added are the Facebook photo channel and a custom RSS feed channel.  The Facebook photo channel monitors pictures posted by yourself or your friends and streams them to your digital picture frame.  The custom RSS feed channel monitors an RSS feed, such as your Facebook status page or any blog RSS feed, then streams the summaries down to your picture frame.

KodakW820-1

KodakW820-2

There are only a few other digital picture frames (mostly with lesser known brands) that connect to FrameChannel, and I’m glad Kodak decided to utilize the service.

A lesser-known feature of the Kodak W820 is that it can reach out to your UPnP media servers and retrieve pictures, music, and videos from there.  I store all my digital media at home in a central UPnP server for streaming to my media player, so I could play them on TV.  The Kodak W820 becomes an additional media player that you can place anywhere in the house.  I do not actually have any media loaded in its internal memory, and just retrieve pictures from my media server.  Although I do not export any media from my Windows 7 computer, the Kodak W820 sees a Windows 7 machine as a media server as well.

KodakEasyShareW820-3

The Kodak W820 is again available from the Kodak store.  There’s now also a new Kodak PULSE, which looks more stylish than the W series, and has a real touch-screen interface.  It’s a tad smaller at 7”, has no video and audio playback capability, and I’m not sure it could connect to FrameChannel or UPnP media servers like the W820.

Posted in Around the House | Tagged , , | 7 Comments

My Quadra 650, A/UX, and Rocket Stage II

One of my main vintage desktop machines has been a Mac LC 475.  I have it running Mac OS 7.6.1, and aside from being my main Classic box, it’s SuperDrive was previously the only practical way I was able to transfer files into my Apple IIgs using 800K diskettes.

I like the slim form factor of the LC 475.  It does have its limitations.  The LC 475 comes with an FPU-less 68LC040 in its default configuration.  It’s easy to replace the CPU with a full 68040, but you’ve got to be cautious in providing a better cooling mechanism.  The most frustrating limitation is the single LC PDS expansion slot in the LC 475.  I’d like to have my systems all connected via Ethernet, but an Ethernet card takes up that single expansion slot.  And I want to use that slot for the Apple IIe card.

I do have several SCSI-Ethernet adapters that works with the LC 475.  However, I just decided to shop around for another system.  Several systems I looked at included the Quadra 660AV (slim, but too wide, and has the same expansion card limitations), and a Mac IIci (small, but not too powerful, and no built-in CD drive).  I came to settle for the Quadra 650.

Quadra 650s, for some reason I don’t understand, are cheaply available on eBay (at least, at the time I was looking).  However, because of its weight, its shipping cost is usually higher than the product cost.  I waited a couple of weeks, and snagged one from the local Craigslist for $10 (sans hard drive).

AppleQuadra650-1

First step was to bump the RAM up to the maximum of 136MB.  32MB RAM sticks sell for about $5 shipped.  I installed a spare 4GB SCSI drive because I intended to use the machine as a quad-booting system.  I also had a spare manta-ray-like Farallon AAUI-Ethernet adapter so I could use Ethernet and TCP/IP.  Finally, I installed a Radius Rocket Stage II in one of the three NuBus slots to be used as another virtual system.

AppleQuadra650-3 AppleQuadra650-4

Since A/UX was one of the systems I wanted to use on it, it was the first to be installed.  The A/UX disk partitioning utility does not check for an Apple-branded hard drive and was able to perform the initial partitioning:  1GB for Mac OS 7.6.1, 1GB for Mac OS 7.5.5, 1GB for Mac OS 7.1, 500MB for the A/UX boot partition (7.0.1), 500MB for the A/UX root partition, and the leftover for the A/UX swap partition.

  AppleQuadra650-8

AppleQuadra650-7

 AppleQuadra650RocketStageII-1

This machine rocks!  Well, relatively.  Netscape 4 is still a viable browser for sites that don’t have too much JavaScript.  The machine can also serve as a software-based MacIP gateway for my Apple IIgs, using Apple IP Gateway, Viacom Internet Gateway, or IPNetRouter.

I quad-boot using the SystemPicker utility, so I could run different versions of Mac OS (Apple IP Gateway, in particular, only runs over Classic networking, so it does not run on Mac OS 7.6.1 which uses Open Transport).  The Rocket Stage II is running a virtual system with Mac OS 7.1.  There’s a chromivncserver VNC server available on the net, but performance was not suitable for regular use – it’s good when you run your Mac as a headless server and only need occasional access to the screen.  I’ve also been able to install Apple’s MacX and use the Quadra 650 as an X11 terminal into my Linux box.

Among the vintage machines on my desk, the Quadra 650 saw more use than my Windows 98 system in the past few days.  I hope the LC 475 is not jealous.

Posted in Retrocomputing | Tagged , | 2 Comments