About two or three years ago, the BlueSCSI open-source boards came about from the retro-computing community. These devices have a SCSI interface, either the DB-25 DSub or the 50-pin IDC connector, and they emulate SCSI devices via some “disk” images in a FAT32-formatted microSD card.
I was partially on hiatus from the retro-computing community already about 5 years (I still am), but I could not ignore the developments happening in SCSI emulation. I have always been a proponent of SCSI, more on that in a future blog post. Last year, I bought several of the BlueSCSIv2 devices and have started using them on my Apple IIgs and my 68k Macs. I would just copy the backup images of partitioned and ProDOS-formatted drives into the microSD card, and the Apple IIgs would boot from the BlueSCSIv2 device without any issues.
There are numerous drive images publicly available for download and use as a starting point for running GS/OS without having to go through the standard installation process. But what if you want to create your own hard drive installation from the official installer diskettes? System 6.0.1 installation officially came in 6 800KB 3.5” diskettes, and the images of those diskettes are readily available in the Internet (one mirror here).
Possibly the most straightforward way is to run an Apple IIgs emulator (e.g., kegs, gsport, etc.), mount the installer diskette images into the virtual drives of the emulator, and perform a hard disk installation in the emulator. The resulting virtual disk is often in a form that can just be copied over to a microSD card and used in BlueSCSIv2.
However, even without an emulator, you can perform a hard disk installation on your Apple IIgs equipped with a SCSI card and the BlueSCSIv2. The BlueSCSIv2 is able to emulate a SCSI floppy device. There are real SCSI floppy devices manufactured in the `90s and they are now getting rare.
In my Apple IIgs, I assigned 0 (zero) as the SCSI ID of the SCSI card inserted in Slot 7, just to be different from the default SCSI ID of 7, configured via some switches on the card. That leaves emulating up to 7 other SCSI devices in BlueSCSIv2. For the hard disk image, just create a zeroed file of the desired size. In my test, I created an empty 100MB file. Using the BlueSCSIv2 naming conventions, I assigned this 100MB file to SCSI ID 1. Four of the installation diskette images are assigned to SCSI IDs 2-5. I only used the first four diskettes, but you could just as readily assign the remaining two diskettes to SCSI IDs 6 and 7.
The following screenshot is from a listing that mounted the 16GB microSD card on a Windows machine: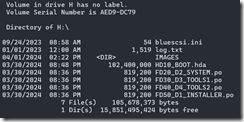
On initial power up, bootable SCSI devices are inspected from the highest SCSI ID going downward. That is why I assigned the first diskette, the Installer diskette, into the highest SCSI ID of 5 in the group.
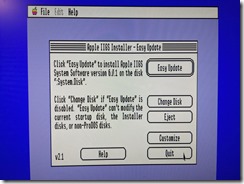
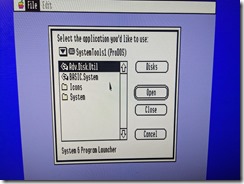
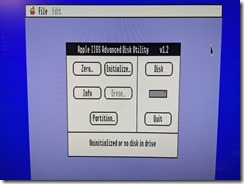
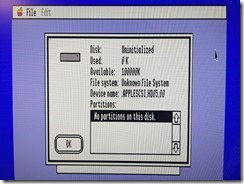
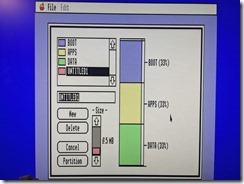
Upon boot, the standard Installer runs and you can select options for a hard drive installation. Since the 100MB drive is still unformatted, you want to quit the Installer and run Advanced Disk Utility, located in the System Tools diskette (Diskette 3). That will allow you to partition the 100MB and initialize each partition with the ProDOS file system.
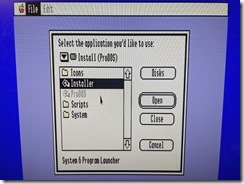
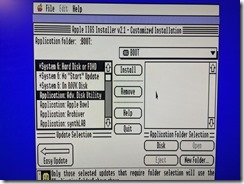
You can then go back to the Installer and proceed with the hard drive installation. Because the four (or six) diskettes are all assigned to separate SCSI IDs, they are all mounted and there will be no prompts for swapping diskettes, as it would when installing from an external 3.5” drive.
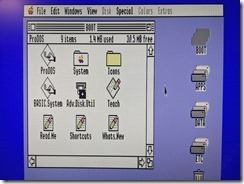
Within just a few minutes of installation, your 100MB will be ready and bootable. One thing I noticed when the installation was completed was that the “floppy” device (SCSI ID 5) that initially booted the system seems to be in an “ejected” state, and rebooting would boot from the freshly installed 100MB drive. Also, once you reach GS/OS, you will notice that the “floppy” devices are not mounted on the desktop. Perhaps GS/OS is looking for a partition map on all the SCSI devices. The floppy diskette images definitely do not have partition maps, and could be why they are not recognized or mounted.
However, upon a power cycle of the machine, it would again boot from the highest bootable SCSI ID (SCSI ID 5), which is the Installer diskette. To consistently boot from the hard drive, it would be just as easy to erase the diskette images from the microSD card once the installation is complete. With only a single SCSI device emulated by BlueSCSIv2, the machine will regularly boot from that 100MB drive. You can then play around with the other SCSI IDs as a means of transferring downloaded software over to your GS/OS installation.

I’m trying to recreate your steps with my own IIGS and BlueSCSI, but the IIGS only seems to see the highest ID device on the SCSI chain. I cannot change to the other floppy drives nor see the 100MB hard disk device. Looking at the log on the BlueSCSI, it properly sees all the floppy images and mount everything as expected, but the computer only sees one. I am using a gglabs A2SCSI-A01 which is a clone of the Apple II SCSI card (original, not the high speed).
Another problem I see is that when I mount a prebuilt IIGS hard drive image the system boots but displays a warning:
“SCSI device requires a driver. Please install SCSI driver on boot disk and re-boot system. [OK]”
Pressing enter continues booting and it seems to work okay, but when I run the Advanced Disk Utility it displays a similar message about SCSI drivers and cannot display the partition table.
Did you happen to run into either of these problems in your experience?
No, I have not encountered the issues you mentioned. I am also using the BlueSCSIv2 with the DB25 connector if that makes a difference.
I believe the SCSI driver is optional and may not be present in your boot disk image, but it improves read/write performance from what I remember. You could just look for the driver and copy it to your boot disk image.