The Apple II High-Speed SCSI card is one of my favorite peripheral cards for the Apple IIgs. I typically install System 6.0.1 into a SCSI hard drive and use that as my boot and mass-storage drive. Any old “SCSI” hard drive should work, but what I use is the scsi2sd adapter that allows me to emulate the SCSI drive with a microSD card. It additionally allows me to make a raw backup of the drive contents using any disk imaging tool on a machine that has a slot for SD/microSD (I use the standard dd utility). With CiderPress, I can even import files into the microSD card. Files that I later read from within the GS/OS environment.
GS/OS can either boot from a drive containing a raw ProDos file system (maximum size is 65535 blocks, each block being 512 bytes, a little less than 32 MiB in total size) or, with the SCSI card, from a partitioned drive with a ProDos partition (the partition having the same size limits). For a partitioned drive, it has to be using the Apple Partition Map (APM) style of partitioning, and not the more common MBR or GPT partitioning. The APM partitioning style was standard with older Macs, those that were before Intel-based Macs came about.
If you treat the CD as a regular block device and lay out the blocks like that of a hard drive, partitioned with APM style partitioning, then GS/OS can be booted from that CD. Of course, with just APM style partitioning, the CD will not have the ISO9660 file system and will not be natively mountable in systems that do not understand APM-partitioned block devices. These types of GS/OS-bootable CDs were evident in some popular CDs distributed around that time. Examples are the Golden Orchard CD and the early Developer CDs made by Apple (like the Phil and Dave’s Excellent CD).
Below are the steps I followed to create a GS/OS-bootable CD. This is just one of many ways that it can be done; I was just trying to use the simplest, and free, method on a Windows machine.
Third-party utilities.
If you haven’t done so already, download CiderPress. This used to cost a few dollars, but Andy McFadden has since made it free and open-source. This utility will let you work with ProDos and HFS file systems, with either raw file systems or an APM-style partitioned drive, and with either a real block device or an image of a block device.
Another utility I used is a drive image overlay/extraction utility. There is either the Windows port of dd, or the Windows port of busybox (that includes dd as one of the commands).
Another utility I used is a Windows port of mkisofs. I used this to initially create the APM partition map. There are other options available to do this, including 1) using pdisk on an OS X machine, 2) using the commercial TransMac software, 3) using a combination of VirtualBox and GParted, or 4) waiting for Andy to include this feature in CiderPress (I saw that it is one of the requested features).
Finally, a hex/binary editor is always useful. I use HxD because it’s simple and free.
Creating the bootable ProDos file system.
GS/OS needs to be installed into a ProDos file system somehow. CiderPress easily lets you create an empty 32 MiB ProDos disk image – you then assign the disk image in an Apple IIgs emulator like KEGS/gsport and follow the standard GS/OS hard drive installation process. Or you could download some pre-built bootable 32 MiB ProDos disk images around the net. Check out Alex Lee’s What Is The Apple IIGS site. I will use a ProDos file system image (e.g., P1_BOOT.PO) as the first, and sometimes only, partition in my APM-style partitioned disk image.
Creating the partitioned disk image.
I create a folder containing my file system images (e.g., P1_BOOT.PO, P2_APPS.PO, P3_HFS.PO, etc.) and run mkisofs:
mkisofs.exe -hfs -part -no-desktop -o CD.iso C:\FileSystemImagesFolder
This creates a hybrid ISO9660/HFS CD. A hybrid CD is one where the CD files can be accessed using both the ISO9660 file system and the HFS file system, with only a single copy of the file data somewhere on the CD. The files here, of course, are the file system images P1_BOOT.PO, P2_APPS.PO, and P3_HFS.PO; not the individual files within the the file system images.
If you plan to put more than one file system image in the CD, my example makes use of 32 MiB (65535 blocks) file system images so that using the hex/binary editor to modify the partition map will later be easier.
The partition map that mkisofs creates contains two entries only – an entry for the partition map itself, and another for the hybrid HFS file system. The partition map starts at offset 512 (0x200) of the disc image and each entry is 512 bytes in length.
Replacing the partition map entries.
If I only had one file system image to put on the CD (e.g., P1_BOOT.PO), then that file system image will be positioned at offset 0xC000 (block 0x60) of the CD image. We can replace the second partition map entry with the following pre-made 512-byte file:
busybox.exe dd bs=1 count=512 if=PRODOS1_65535.PME of=CD.iso seek=1024 conv=notrunc
What ends up is that we keep the CD ISO9660 file system, but we replace the hybrid HFS file system entry in the partition map with the ProDos partition map entry.
If I wanted to put more than one file system image on the CD, I need to enumerate the partition map entries at 512-byte intervals, then I need to edit each partition map entry to reflect the number of partitions and the offset of each partition in the CD.
For example, suppose I also wanted to make the second P2_APPS.PO (65535 blocks) and P3_HFS.PO (65535 blocks) file systems visible in GS/OS:
busybox.exe dd bs=1 count=512 if=PRODOS1_65535.PME of=CD.iso seek=1536 conv=notrunc
busybox.exe dd bs=1 count=512 if=HFS_65535.PME of=CD.iso seek=2048 conv=notrunc
Then edit the disc image to specify the correct count and location of the file system images:
Burn the CD image.
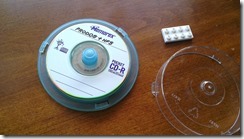
The final step is to burn the CD image into a real CD-R. On Windows, I use ISO Recorder, but any raw-disc-image burning application should work. For such a small CD image, I sometimes use the smaller 185 MB pocket-sized CD-R discs. If you have the scsi2sd or other mass-storage devices (e.g., MO drive, SCSI-IDE bridge), you can actually dump the same CD image into those devices.
Boot the CD from a SCSI CD-ROM drive.
Put the CD into a SCSI CD-ROM drive, attach the drive to the SCSI chain, and boot from the CD. Remember that the Apple IIgs boots off from the SCSI device with the highest SCSI device ID, and that an unmodified Apple High-Speed SCSI card does not provide termination power to the SCSI bus. Either mod the card or have another device provide termination power.
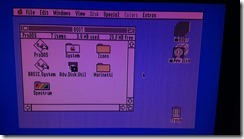
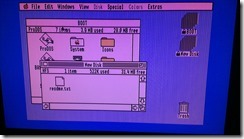
Here are some screenshots of one of my Apple IIgs booted from a CD with two file system images (the bootable ProDos file system image and one additional HFS file system image). Note the block devices are locked/readonly.
Caveat with all the above – it should be obvious that because this is a CD, the drive is read-only. Applications that attempt to write data back to the drive may or may not fail, but will surely lose that data because it is not persisted.
Files.


Great review of the apple cmueotpr. I wouldn’t call the Apple IIGS cheap though. For a bare-bones, ROM-01 version with no expandables, you’re right about them selling for as cheap as $40 (probably more like $100 though). However IIGS peripheral cards, harddrives, and other expandibles sell for ridiculously high prices. Even just the ROM03 version alone will usually go for over $200.